Tuesday, May 20, 2014

Target Inspired Photo Frame


So guess what? I just finished my 20 credit hour semester and... I survived! I am currently on summer break although I am taking one summer class. It is online so it doesn't really count. I am looking forward to more blogging and relaxing. I have a lot to share with you, we have been busy!

First thing's first. I was at Target awhile back and saw these frames:


Come on.  I mean. So cute right? I started to picture where I would put them in my house when I thought, I could totally make these! So... I did. Sort of. They're not an exact replica but I love them, and I love how Target continues to inspire me to make decor on the cheap!

Here are the supplies I used:


I also used Mod Podge, binder clips with magnets (although the magnet serves no purpose, it is just what I had on hand), mini alphabet stamps ($1 at JoAnn's), black ink pad, and scrapbooking paper ($1 at Target!). There's a lot I left out of the photo! :)

This is the part where we pretend I have step by step pictures.

First I painted my wood frames (I keep a stock of these but they are $1 from Michaels) with the silver acrylic paint. I painted the sides of the frame as well as the inside part of the center frame. I didn't want any bare wood to show through the burlap!

I placed the burlap on top of the frame and cut out where the center would be. I used Mod Podge to adhere it together and to be honest, I wasn't sure if this would work. I did like how easy it was to line up the cut center of the burlap to the frame so it'd be straight! Luckily, it adhered nicely and I haven't had any problems with it peeling off.

I took my alphabet stamps and stamped "I love you forever and ever." onto the burlap. This part was a little frustrating. The stamps were too small so I had to carefully stamp over each letter to make it readable. I'm sure with a larger alphabet this would be easier too accomplish!

I also took the twine ($1 at Target!) and framed where the picture would go and inserted a piece of scrapbooking paper from a paper pack that was also at the Target dollar spot.

I hot glued the binder clip above the frame and printed out an Instagram photo using my Canon Selphy.


My stamping is a little crooked but I like it that way! I think it turned out super cute. While it's not an exact version of the two at Target, it is my own. The best part is I used up some of my stash to get it finished! My craft room is still under construction so any chance I can craft, I'm going to take it.

I have a list of posts I want to share with you so be on the look out!

Thanks for visiting,

Amanda

Linking Up:

Thursday, March 27, 2014

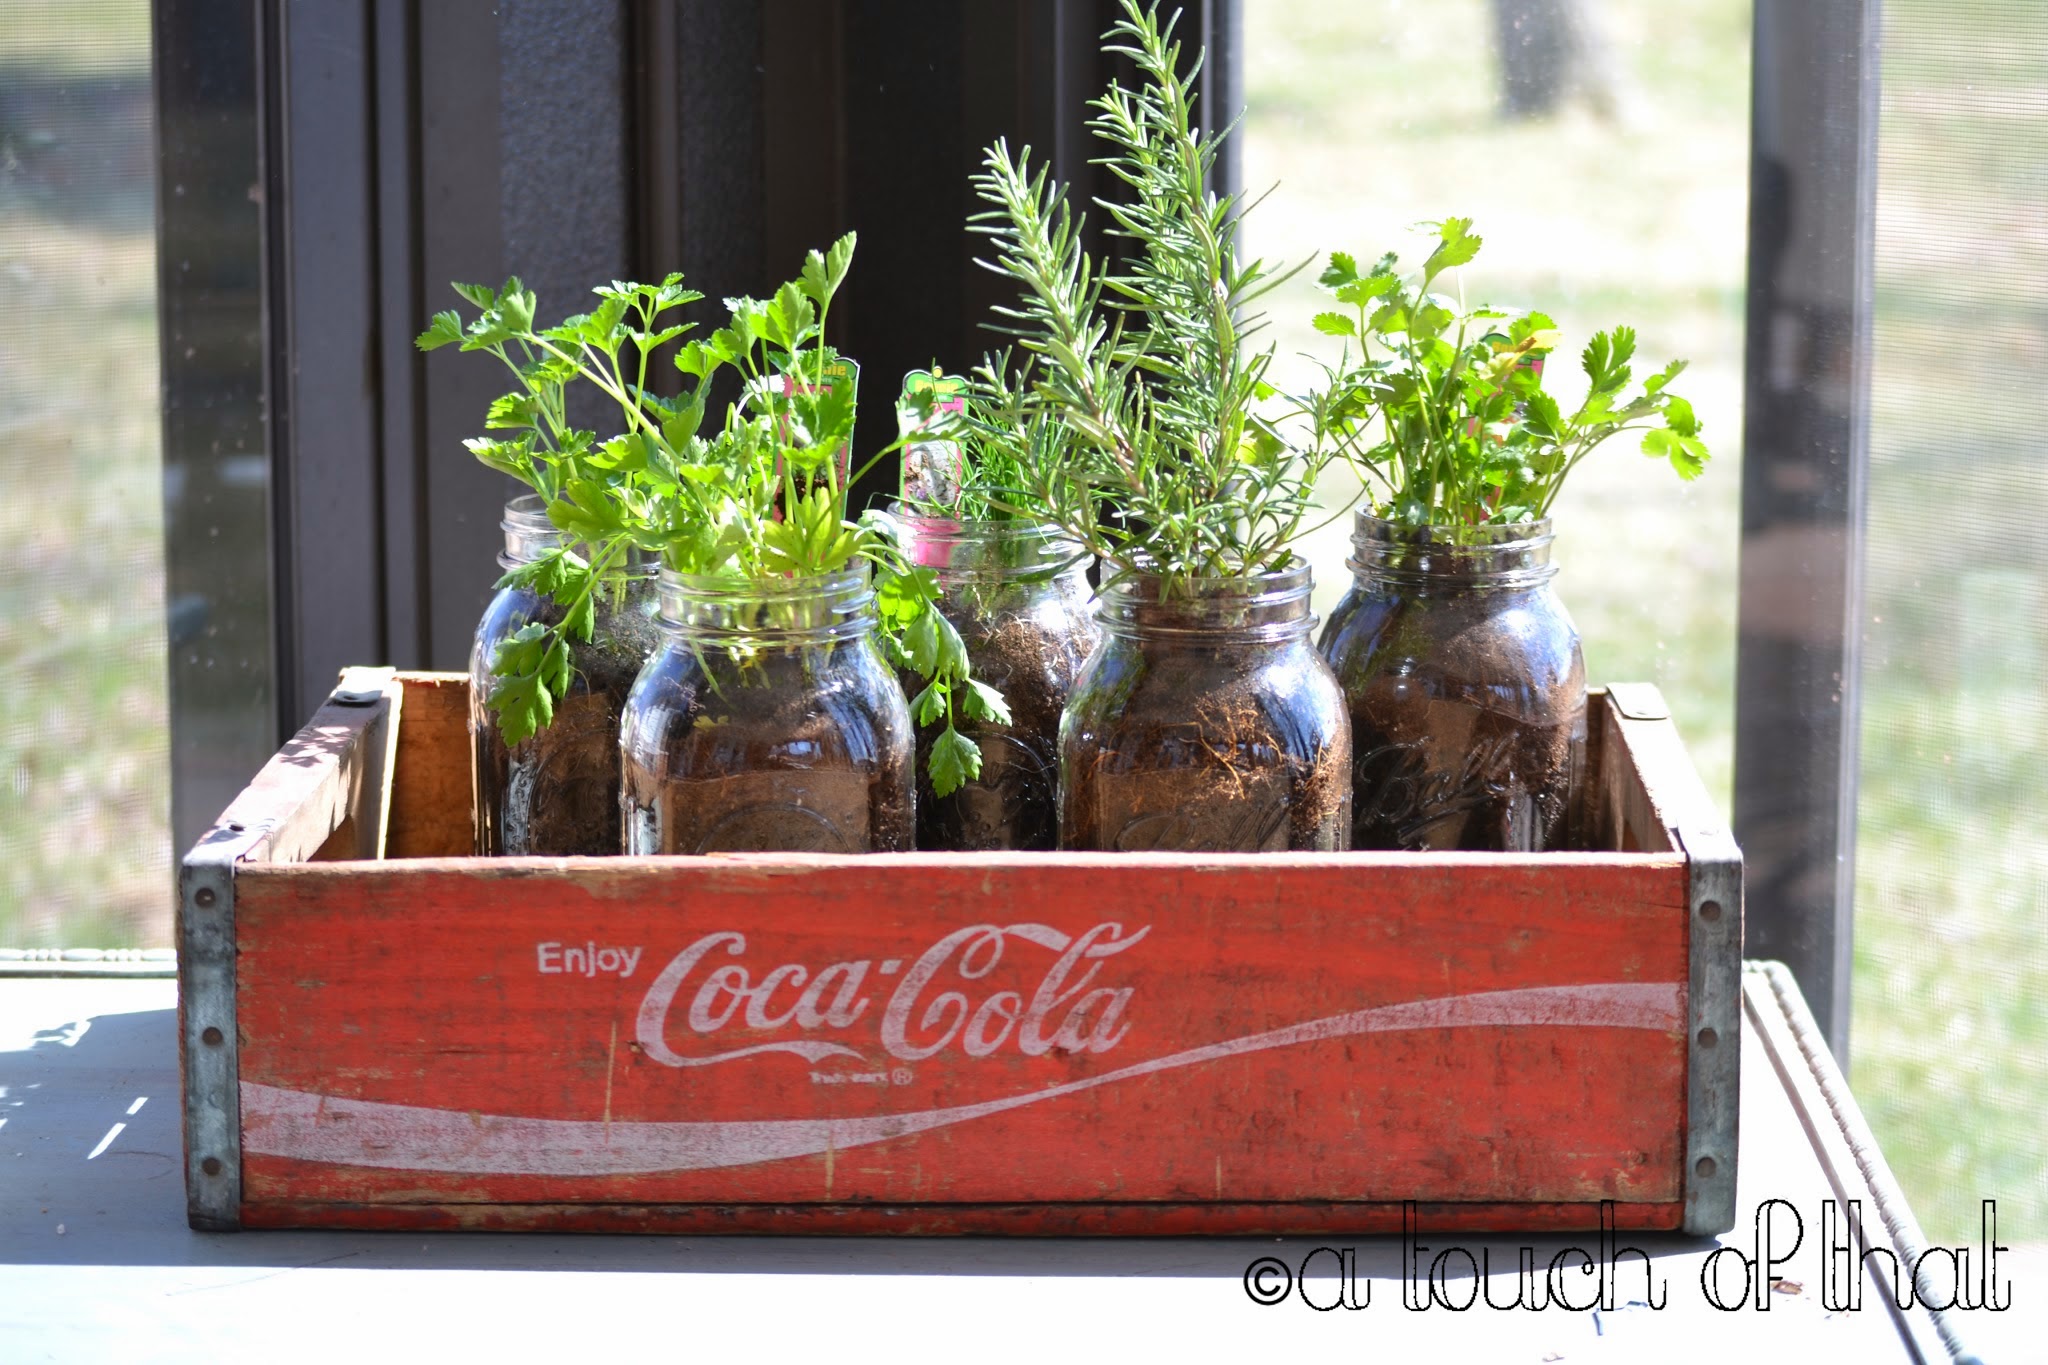
Mason Jar Herb Garden

Hello everyone!

   I know it's been awhile. This semester has been jammed packed! I knew I was going to be expecting a lot of work, with taking 20 credit hours, but it's not only homework and studying that has kept me busy. A lot of outside school work and commitments have been taking up my time. I guess that is what happens when you are this_close to finishing!

Anyway, I've been wanting to do some more projects. We are in the middle of remodeling our right side basement (we have a partial) into my croffice! Craft room/office. We just laid the flooring and will be grouting it soon. I can't wait to share it with you. However, my stuff is all over the place and I can't find anything I need to craft up some projects. Wahh wahh.

So I went on Pinterest because spring has gotten me motivated to garden. I love fresh herbs and knew it would be beneficial to have some on hand. So I made a mason jar herb garden!


This really is too easy to be a "DIY." The products I used are: quart sized mason jars, river pebbles, organic potting mix, and rosemary, parsley, chives, and cilantro. I love how the herbs are in a biodegradable "pot" and the whole thing could be planted into the ground! I am new to gardening so a lot of this stuff is just fascinating haha.


Anyway, I washed the pebbles and placed them at the bottom of the mason jar about a third up. This helps to keep the plants from drowning since there are no holes in the bottom of the jar. Otherwise, the roots would submerge in the water and the plant would die. Next, I filled the remaining space with potting mix. I kind of feel bad because I had to break up a lot of the roots in order to get the plant to fit in my jar. I would recommend being patient and find wide mouthed mason jars. I did not. So I'm hoping they will live. Maybe they will and it's just another newbie gardener worry!

I was originally going to hang them on a pallet skid, but I kind of like having them in my coke crate. ;)


I would still like to add oregano and basil but I have to get seeds for those unless I can find some seedlings at a plant store! I like how there is the perfect amount of room in my coke crate and I can move it around the sunroom to keep it in the sun. The rosemary I believe is the only one that needs full sun. However, the weather still thinks it is winter time and gave us some flurries this week. So, they are in my kitchen until it warms up again.

Have you started gardening yet?


Linking Up:

Wednesday, January 22, 2014

Spice Cabinet Sprucing Up!

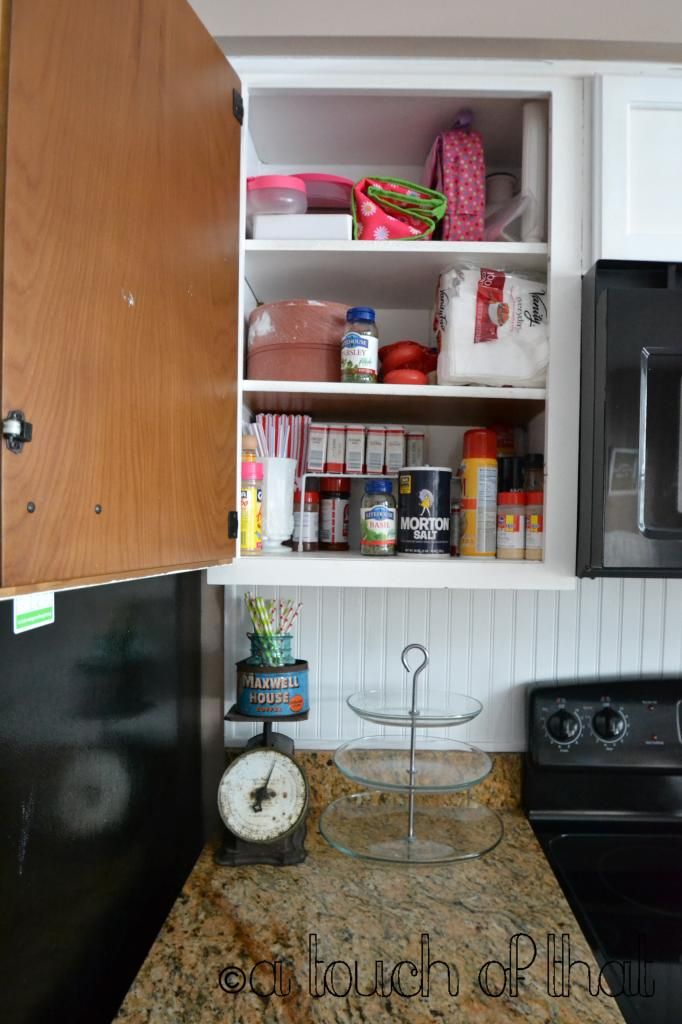
I am following A Bowl Full of Lemons, organizational challenge. This week our challenge is to organize our spice cabinet and unlike my bakers pantry this cabinet is actually right next to my stove! I even have an empty drawer to the left that I can utilize if need be. If you've read about my baker's pantry, our cabinets were painted in a hurry so they're not currently in the best shape. A lot of the doors on the inside were left unpainted.


This is what my cabinet was looking like. I removed everything including the door and they all have a coat of Kilz on them drying. In the spring time we plan to give these cabinets the right amount of love and use a sprayer to do the job. Until then, since these cabinets were the original, I am just touching up where the paint has started to chip. ACK!

I am not sure what I'm going to do with all of that stuff. I am searching for spice jars and haven't decided if I'm going to put them in the empty drawer, or keep them on the shelf. Also, I can't decide what to do with all the other stuff on the top and middle shelf. I will keep you all posted as I finish this cabinet. I think a lot will be moved around!

I start school again on Monday so I am hoping this -7 degree weather will go bye bye. Is it spring yet?

Thanks for visiting!
Amanda

Tuesday, January 21, 2014

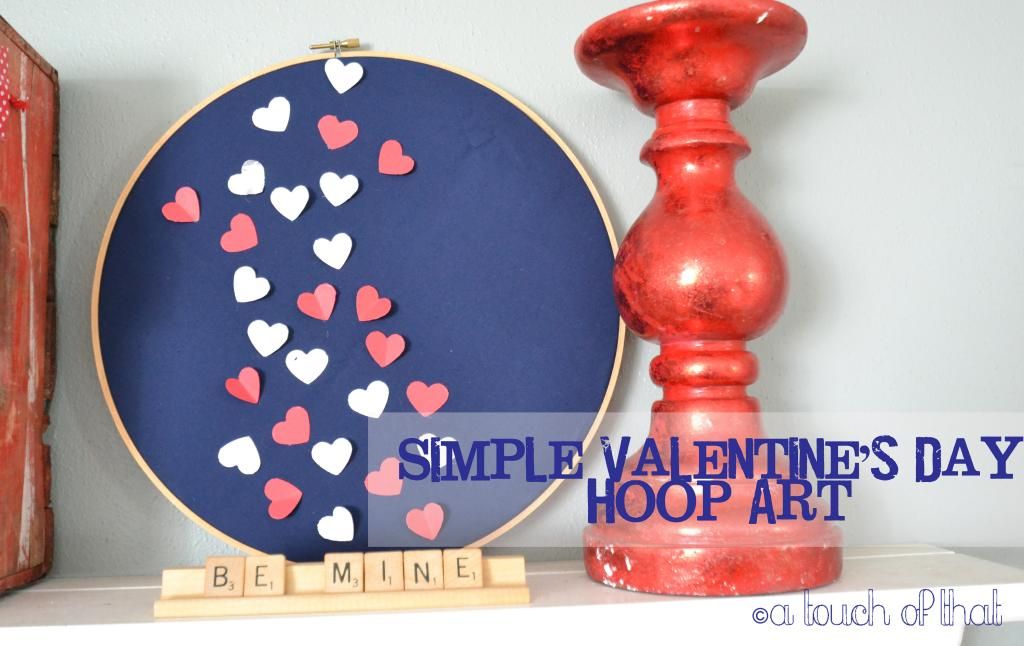
Simple Valentine's Day Hoop Art

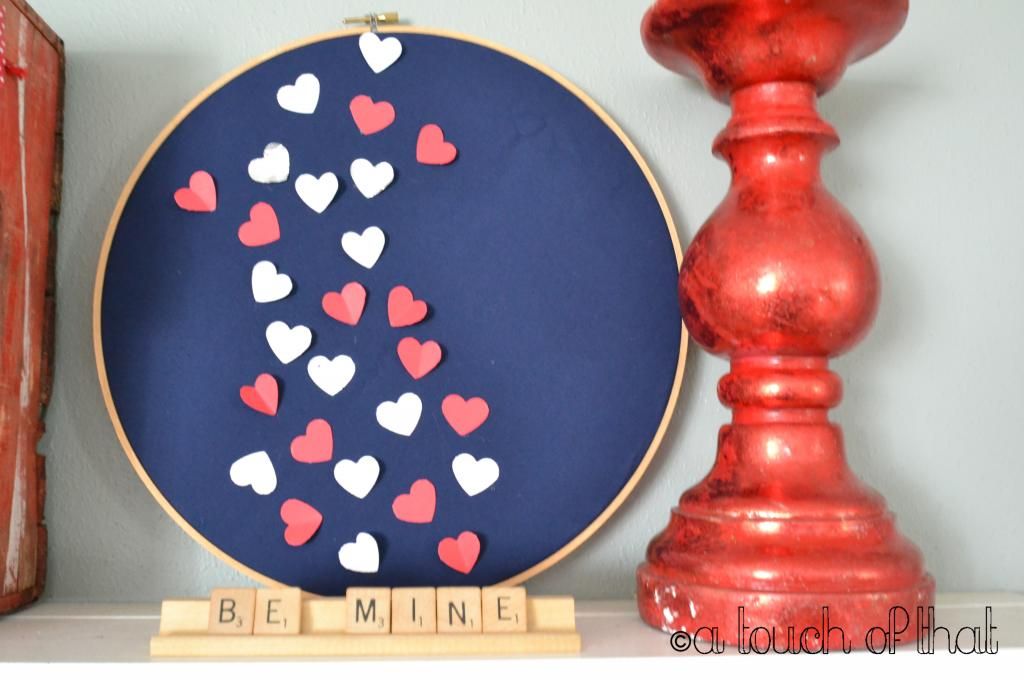
I started this project with the intentions of making a tutorial of how I did this. I took maybe two pictures of the process and then determined it's too simple for a tutorial! It's very easy to recreate.

I like it but it sort of screams Fourth of July to me and not Valentine's Day. So I might throw in some pink around the hoop. Maybe washi tape? My mantle isn't quite done yet to share but I will once it's finished!

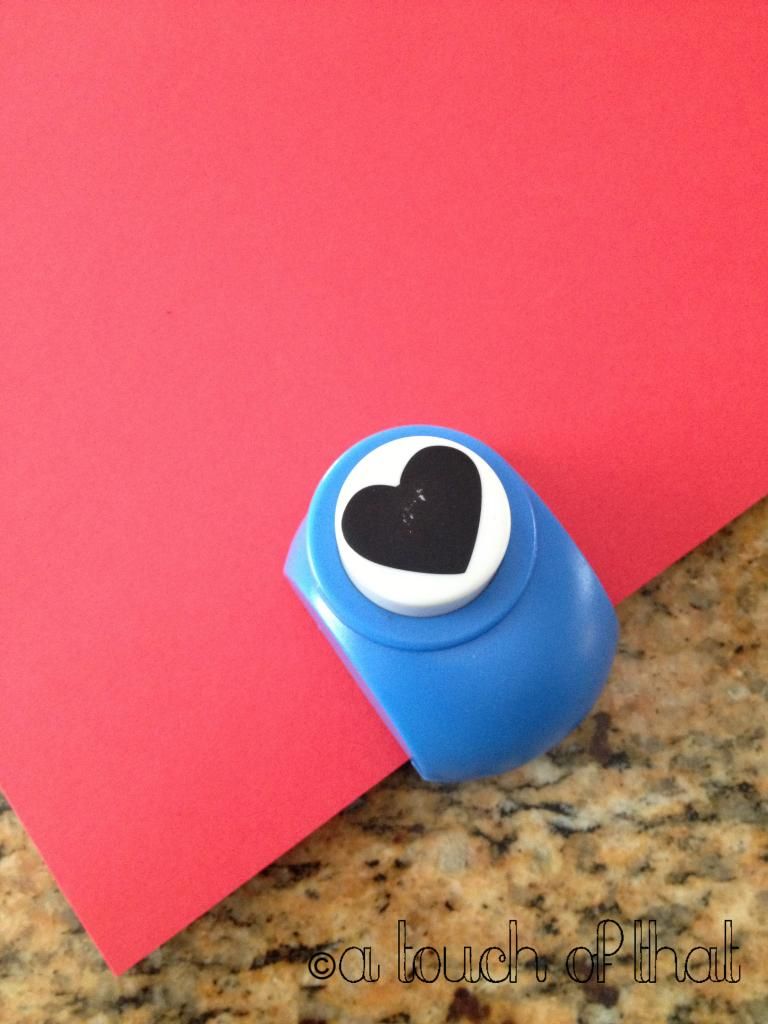
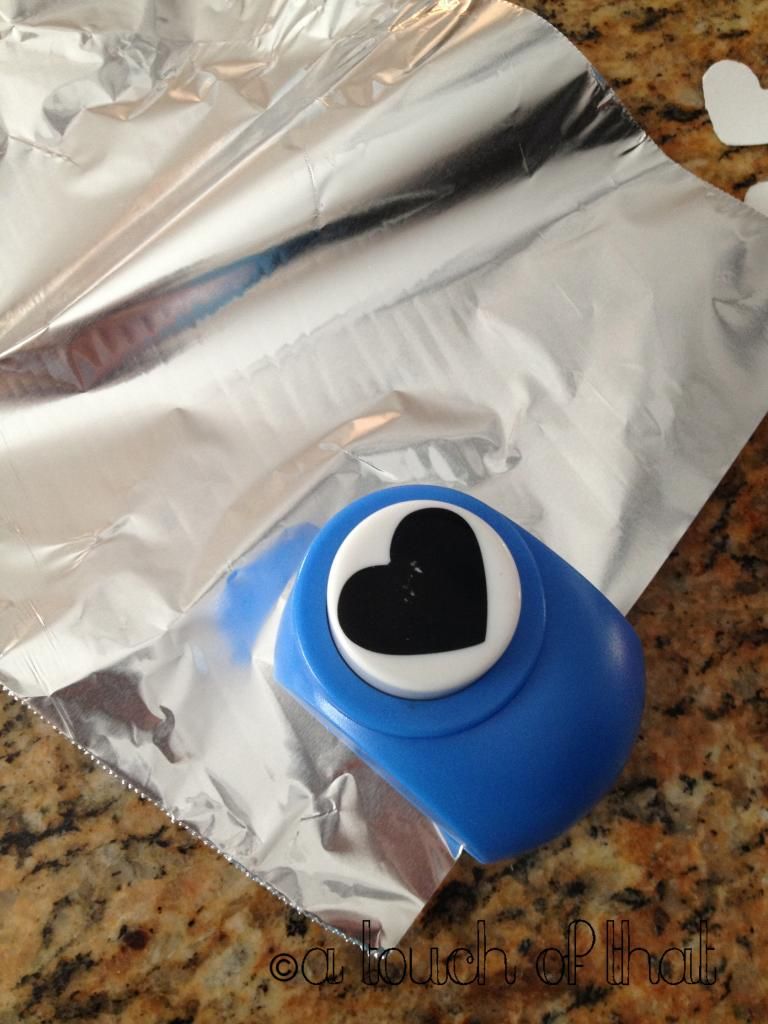
I've had these little punches laying around for the longest so I decided to put it to use. The blade was a little dull so I tried punching aluminum foil to sharpen it up.


It's a little trick I learned when I was blogging about scrapbooking. It worked a little bit but I think these punches have seen better days! It was super hard to punch which always is a bummer. I used hot glue to attach the hearts to the hoop. Some of the hearts I folded in half to make them look more dimensional.


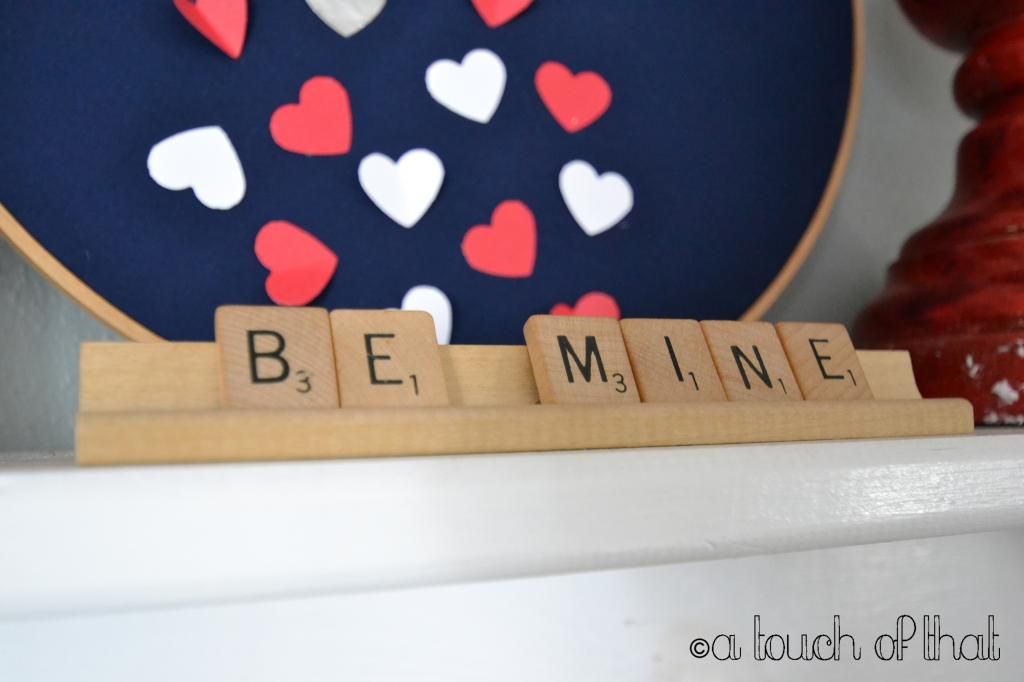
How cute is this scrabble tile piece? I was at my local antique mall and found a few of these. It has made me want to hunt down all of the thrift stores around here so I can find old scrabble games. So much cuteness can be made from those tiles!


Pretty simple! Is anyone else over this snow? Or is it just me?

Thanks for visiting!
Amanda

Linking Up:
Monday, January 20, 2014

Bakers Pantry Reveal


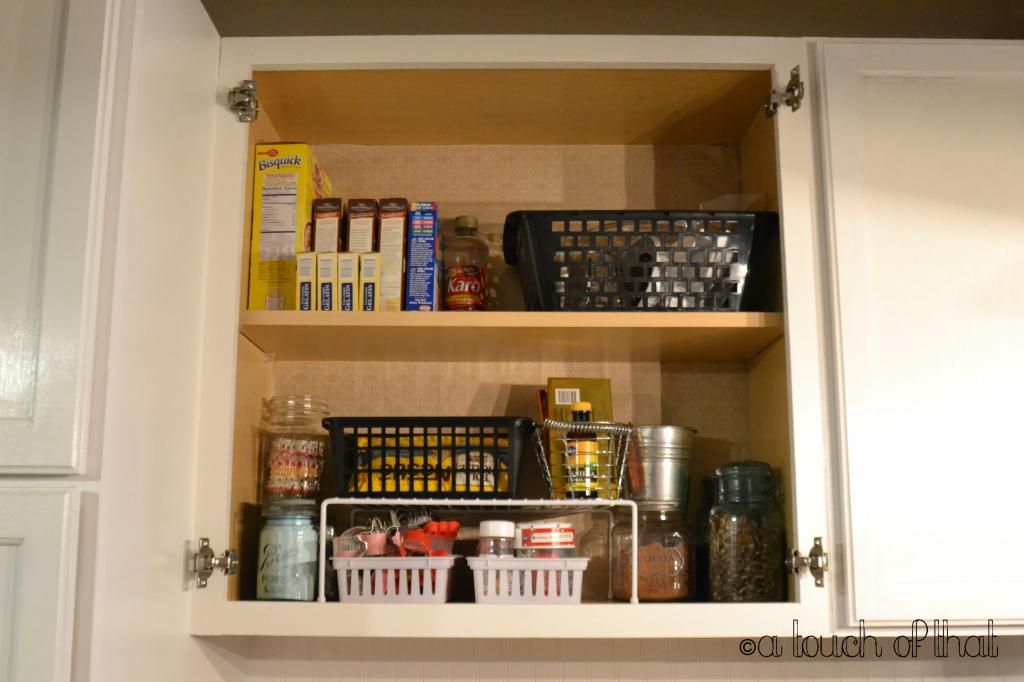
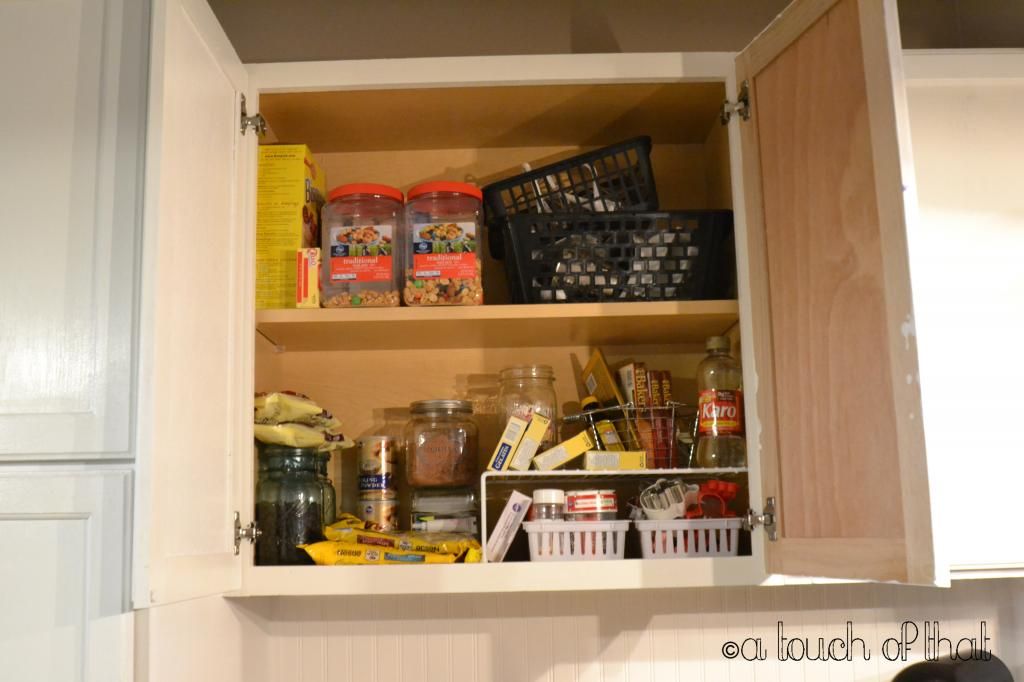
Hey all! I hope you had a great weekend. My hubs surprised me and started framing our laundry room in the basement. I am so excited because I finally get my long awaited croffice (craft room/office) and the project looks to be going pretty smoothly! He finished rerouting the plumbing last night so it's all in a matter of time before I can share it with you. While he was working on framing, I was finishing up my cabinets for my baking pantry. When I last talked about it, this is what my cabinet was looking like:


It wasn't too bad, but I didn't like the layout or the mix matched baskets. Also, my cabinet doors needed to be repainted which is why you see them off in the photo! After spending the weekend searching for matching baskets to no avail, I grabbed what I could from Target and pulled it all together. 


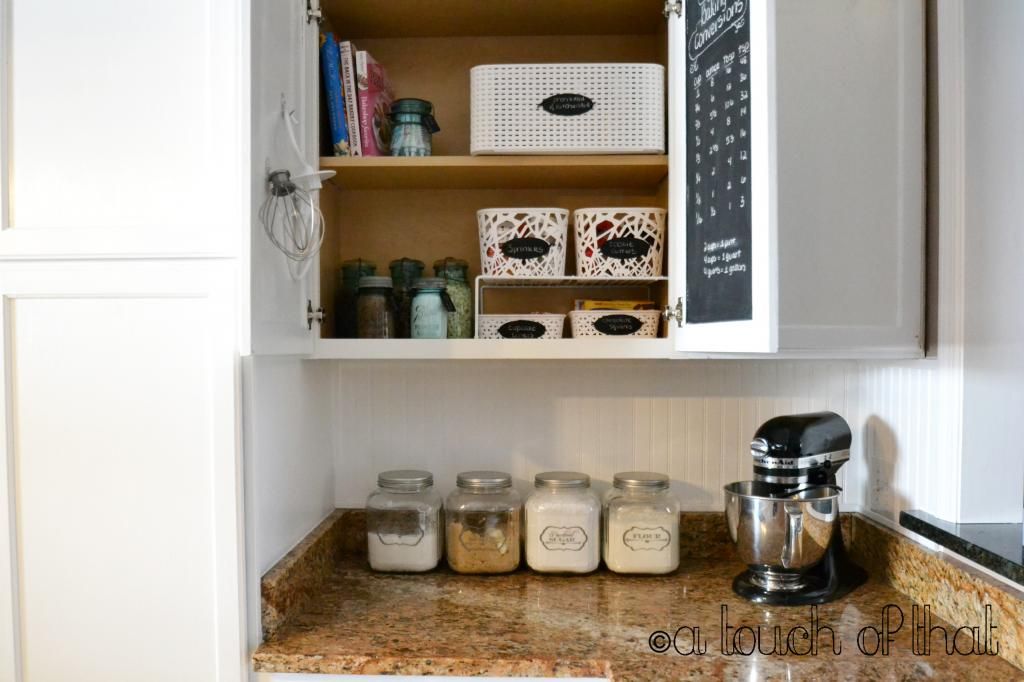
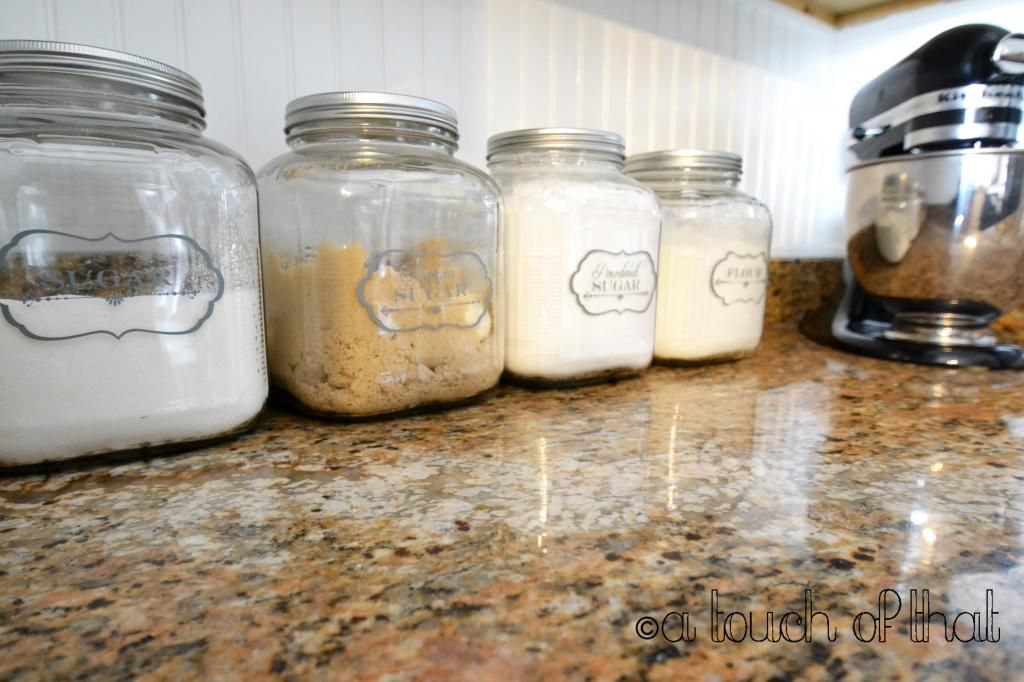
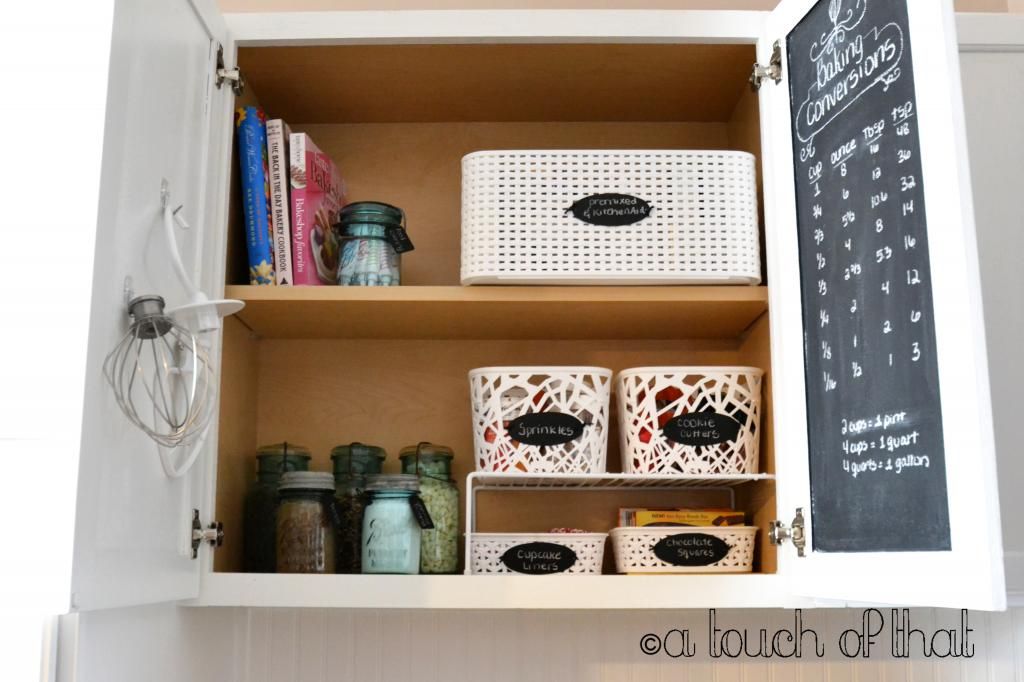
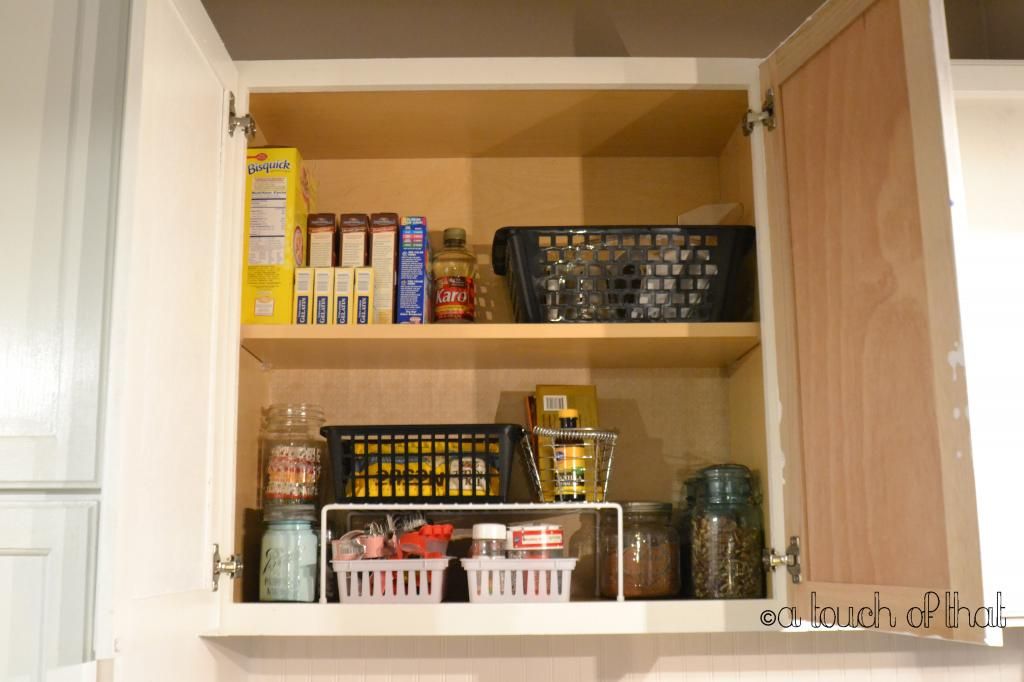
I love love love it! I am so happy I got this organized. Eventually when Target decides to restock, I am going to buy two baskets to replace the large one on the top shelf. Those match the baskets in the middle and are smaller so it would fit better in the space. It looks so simple and bare but there is actually everything I need to bake something from scratch which is nice. In my last post, I forgot to share with you my jars on the counter.

I took large cookie jars from *ahem*, Target... and created my own labels from vinyl and my Silhouette Cameo. It was a little tedious because I couldn't find my transfer tape and the font made the letters very delicate. I love the wide mouth of these jars because it is easier to get a measurement out of it. Oh and I keep marshmallows in my brown sugar to keep it soft. It really works!


I keep my premixed items and my KitchenAid slicer/shredder attachment in the big basket on the top shelf. I also have my cookbooks (I use Pinterest mostly) and my food coloring on the opposite side. On the bottom shelf I have my sprinkles, cookie cutters, cupcake liners and baking squares in the baskets. My mason jars house white chocolate chips, semi-sweet chips, pecans, baking powder and Hershey's cocoa. I am very happy to have everything in one cabinet neatly organized!


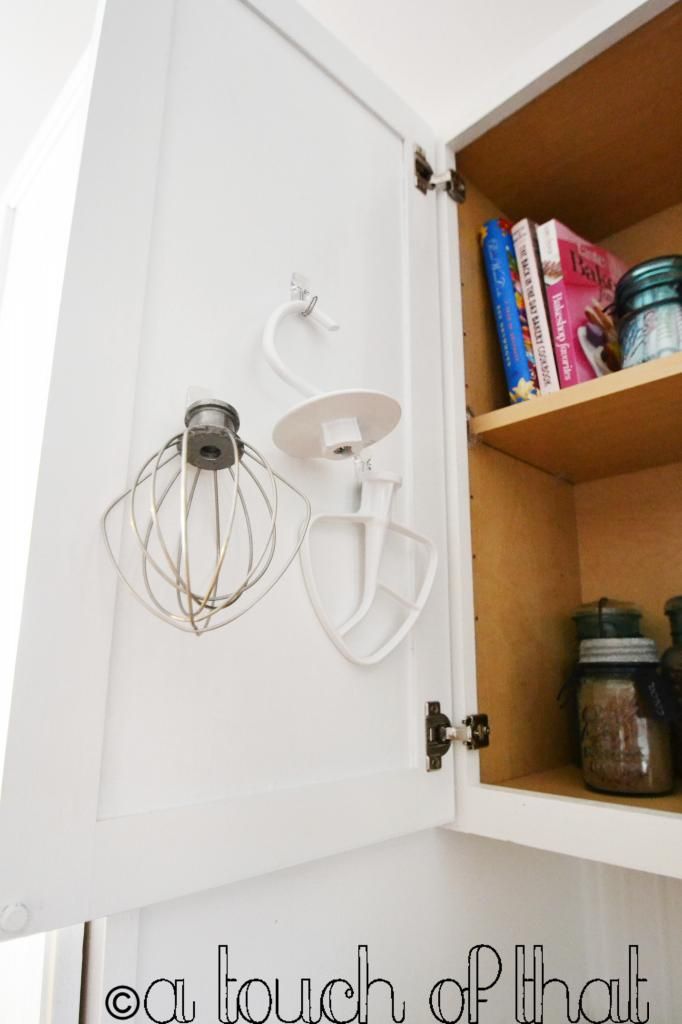
I used command hooks to hang up my mixing attachments. I'm not sure how I like it yet on the door. We will see!


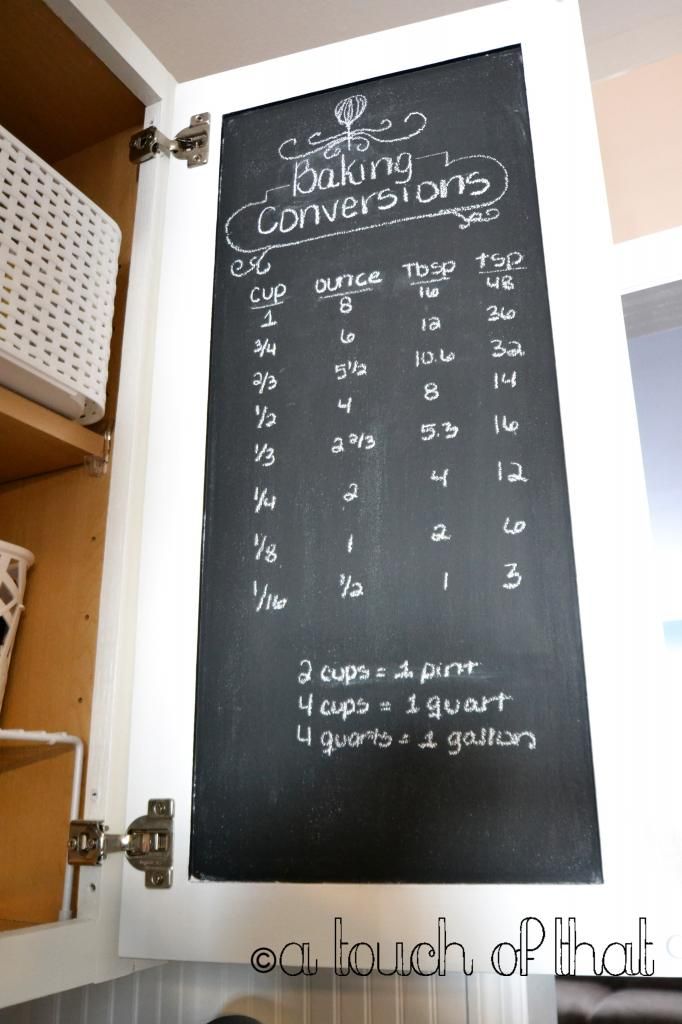
I'm a big fan of the chalkboard. It needs a little bit of touching up but for the most part, this is what it will display. I took the design from two pins on Pinterest. Original source for the conversion here. I can't find the pin where I saw the title and scrolls. I'll be sure to link to it when I do!

That my friends is my new baking pantry! How about a before and after?


So much better right!? Now, I need to reload my motivation to attack the main pantry to the left, and the snack cabinet to the right. It is not a chore I am looking forward too! I will share that when it happens. 

Thanks for visiting!

Amanda


Linking up:

Thursday, January 16, 2014

Bakers Pantry Part 1

So one day I got the itch to throw all of my baking supplies in the cabinet closest to my KitchenAid mixer. It all makes sense right? I mean, my spices are next to the stove, my coffee cups are near my Keurig, so why are all of my baking supplies scattered around the kitchen? The ideal situation would be for my mixer to be on the counter next to the stove but we still have to add a few outlets. Until then, it lives on the other side of the kitchen. It's still a lot easier to walk over to the stove once, instead of multiple times!

It was going good until I noticed things were being stored in there that didn't belong in a bakers pantry. Also, with the baking going on over the holidays, it was starting to lose it's order.


Did I mention when we painted our cabinets it was done in such a hurry that they are a hot mess and, as you see in the picture, some of the inside doors aren't painted? I tried dealing with it. We had planned to repaint the kitchen cabinets, and add hardware in the spring. I thought by cleaning out the pantry, and reorganizing it I would be satisfied.

I was wrong. I've been wanting to paint that bare cabinet door chalkboard so I can list my conversion chart on it. I am not good at math. Often, i am Googling on my phone with floured fingers for a measurement equivalent. On the other side, I want to hang up either my measuring cups and spoons, or my KitchenAid attachments. I haven't decided. I also was over the mix matched storage containers. I'd like to find two more Mason jars for my additional chocolate chips. I went to Target and snagged a few of these and a few of these (only the second link shows a set, I bought two of the pictured ones separately). My Target was out of the large baskets size, similar to the one on the top shelf of the picture above, so I am hoping to find some to replace those. Also, to hold my small amount of baking mixes. I started baking everything from scratch (to use my mixer to it's full potential) so I'm hoping that amount will fit in one basket.

Here is where I am at now,


At least it is cleared out and organized neatly right? I am in the process of re-painting the cabinet doors so I will be sure to share once it is complete. I thought it'd be fun to put some wrapping paper I found a long time ago at the Target dollar spot on the back of the cabinets. I don't like it, it's already wrinkled in the top right corner. I'm going to try and figure out something fun to do back there, maybe. We will see. :)

Thanks for visiting!

Amanda


Wednesday, January 15, 2014

Valentine's Day Printable

Hey Everyone! It's been awhile but the holidays got to me and left very little time to create, decorate or blog. I hope everyone's holiday was merry and you got to enjoy the time with your family!


I have a few updates to our dining room and my daughter's play house to share but until then, I'm sharing a printable I made in Photoshop. Just in time for Valentine's Day!


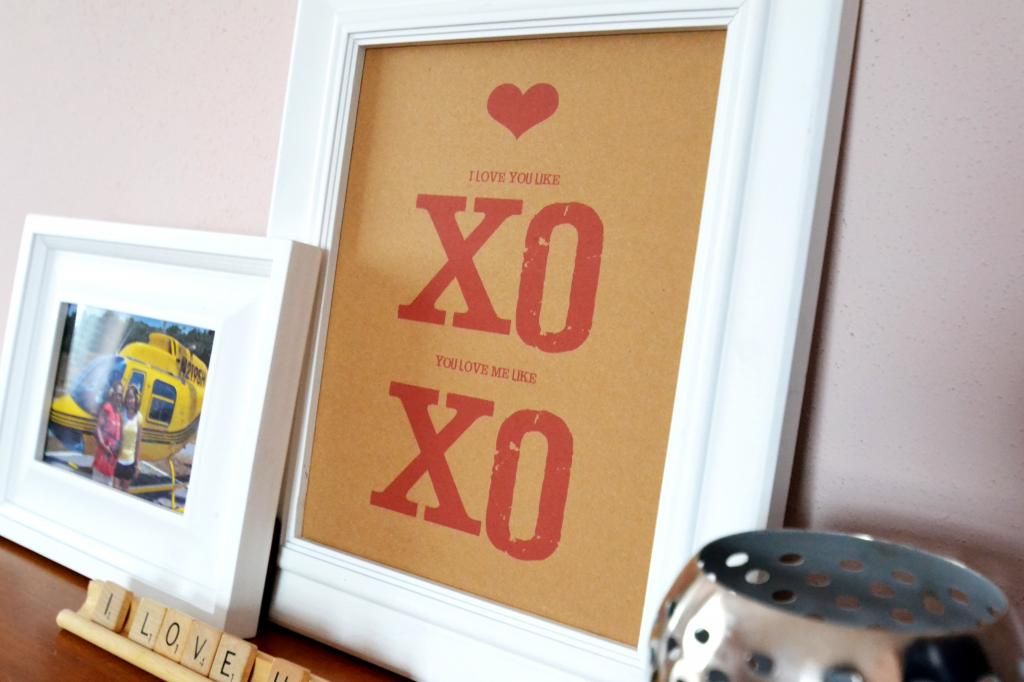
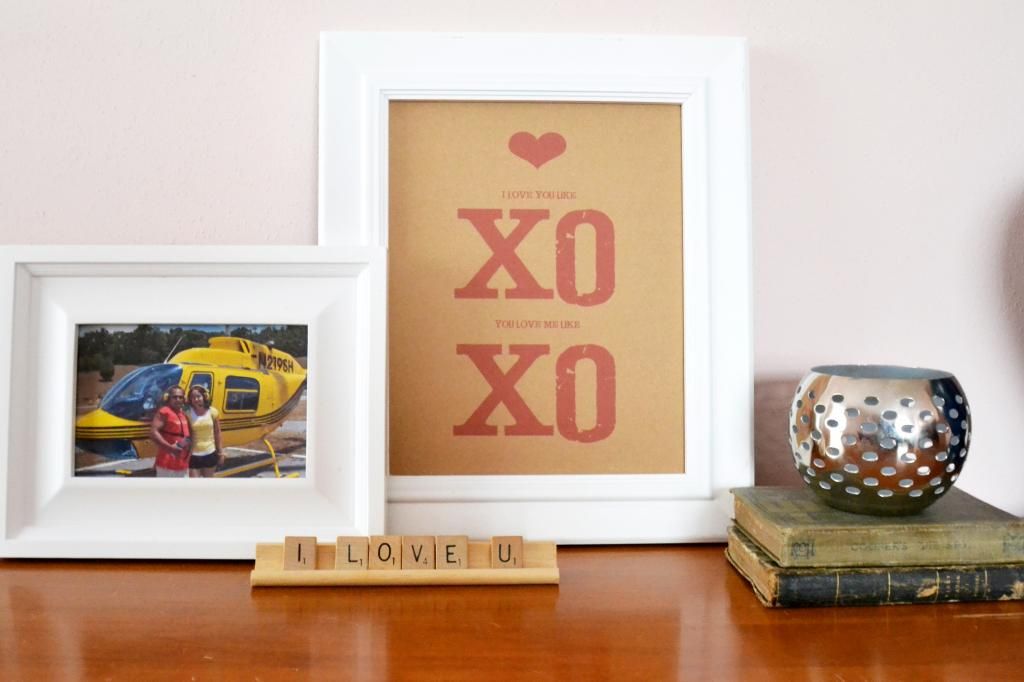
I am a Beyonce fan, and her song, XO is one of my current favorites. I felt the lyrics of the song were perfect for Valentine's Day because it is all about love. So i whipped this up in Photoshop and printed it out. I printed it on both white card stock and craft card stock. I'm thinking I will switch it out for the white copy closer to Valentine's Day. Until then, this will do!


Sorry for the picture quality! It is snowy day today and the lighting isn't the best hence the quick set up in the brightest spot in my room. HA! Also, let's not talk about the pinkish color of my walls. Our bedroom has not been touched since we moved in. If you look closely in the second picture you can see there is a texture to the walls. It must have been a favorite back in the day because it is in several spots of our house. *shudder.* So since our bedroom is never seen, we are focusing on everything else in the house :).

If you want to download this for yourself just click on the picture below, right click and save to your computer! If you use it, just make sure you give credit where credit is do :).


Hopefully I'll be back with another Valentine's Day project and a few room updates!

-Amanda


Linking up: